Saturday, December 24, 2011

Creating your Own Marker Interface

Here we are going to Create our own marker Interface."SingleTon". If any class implements this interface,then its object will be created only 1 time.
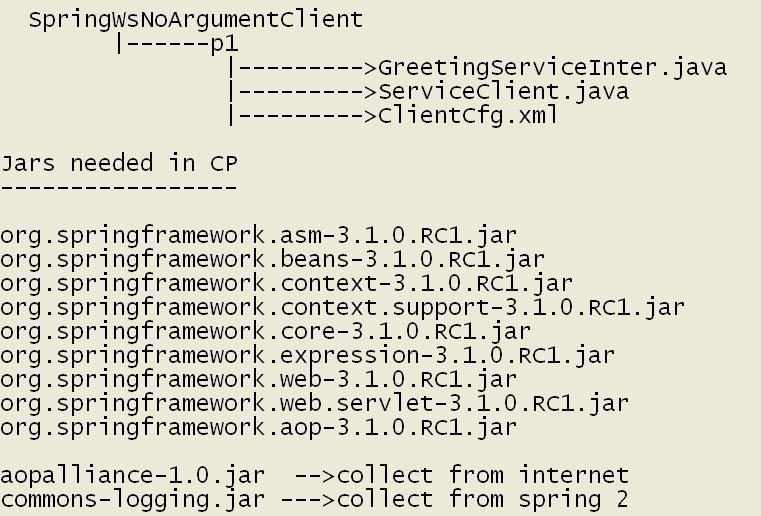
Folder Structure


SingleTon.java 
public interface SingleTon
{
}

FrameWorkContainer.java
import java.lang.reflect.Constructor;
import java.util.HashMap;                 
                                                            
class FrameWorkContainer               
{                                                          
static Object obj=null;                       

//HashMap will Only store those objects whose class has implemented SingleTon interface
static HashMap hmap=new HashMap();

public static Object createObject(Class cls)
 {
    //Get the Exact className,from cls
    String objName=cls.getCanonicalName();
     try
     {//get access to constructor and make it accessible
      Constructor construct=cls.getDeclaredConstructor();
      construct.setAccessible(true);
      //if hmap doesnot contain object with this key,create the object,
      //and store it in hashmap only if that object has implemented SingleTon interface
      //If the object has not implemented singleton,simple return the object without storing in hashmap
   
      if(!hmap.containsKey(objName))
      {
          obj=construct.newInstance();
          if(obj instanceof SingleTon )
              hmap.put(objName, obj);
          return obj;
      }
      else //if hashMap contains that object,return that object
      {   
            obj=hmap.get(objName);
            return obj;
      }
     
     
     }catch(Exception e){return null;}
   
}
}

Client.java 
------------
public class Client
{
    public static void main(String[] args)
    {       
        //Test class has implemented Singleton interface
        Test t1=(Test)FrameWorkContainer.createObject(Test.class);
        Test t2=(Test)FrameWorkContainer.createObject(Test.class);
        Demo d1=(Demo)FrameWorkContainer.createObject(Demo.class);
        Test t3=(Test)FrameWorkContainer.createObject(Test.class);
        Demo d2=(Demo)FrameWorkContainer.createObject(Demo.class);
        t1.sayHello();
       
        System.out.println(t1.hashCode());
        System.out.println(t2.hashCode());
        System.out.println(t3.hashCode());
        System.out.println(d1.hashCode());
        System.out.println(d2.hashCode());
      }
}
Demo.java
------------
public class Demo  
{
    private Demo(){}
}


Test.java
--------------------------------------------------------------------------------------------------------
public class Test implements SingleTon
{
    private Test(){System.out.println("Constructor::Test");}
    public void  sayHello()
    {
        System.out.println("Test::sayHello()");
    }
}


Enabling Https in Tomcat 6.0

This features works in Tomcat 7.0 as well
Steps:-
1.Use keytool tool to generate a keystore  in dos prompt
    C:\>keytool -genkey -alias mytomcat -keyalg RSA
2. A .keystore file will be created under "C:\Documents and Settings\Welcome" folder,
where welcome is your current user

3.Activate https service in your tomcat server,by including .keystore file produced above,in server.xml. These Entries are present in the server.xml,simple enable them and modify keystore file location and password

<Connector port="8443" maxThreads="200" scheme="https" secure="true" SSLEnabled="true"
  keystoreFile="C:\Documents and Settings\Welcome\.keystore"  keystorePass="satya123" 
   clientAuth="false" sslProtocol="TLS"/>                                                                                               

4.If you want you can disable normal Http Service by commenting
<Connector port="8080" protocol="HTTP/1.1"  connectionTimeout="20000" redirectPort="8443"/>

5.Restart the server,and give request to any webapplication using https,It will ask you to save the certificate in your system,and then after you can access the webapplication using https

Thursday, December 22, 2011

Batch Update Using PreparedStatement with MySql Database

BatchExecutePreparedStatment.java
----------------------------------------------------------------------------------------------------------
import java.sql.Connection;
import java.sql.DriverManager;
import java.sql.PreparedStatement;

public class BatchExecutePreparedStatment {

    public static void main(String[] args)throws Exception
    {
         String userName = "root";
         String password = "root";
         String url = "jdbc:mysql://localhost/dhportaldb";
         Class.forName ("com.mysql.jdbc.Driver").newInstance ();
         Connection con = DriverManager.getConnection (url, userName, password);
        
       con.setAutoCommit(false);
      
     
       PreparedStatement pst=con.prepareStatement("insert into employee values(?,?)");
      
       pst.setInt(1,100);
       pst.setString(2,"raj");
       pst.addBatch();
      

       pst.setInt(1,200);
       pst.setString(2,"satyam");
       pst.addBatch();

       pst.setInt(1,300);
       pst.setString(2,"wipro");
       pst.addBatch();
      
      int count[]=pst.executeBatch();
      con.commit();
     
      for(int i=0;i<count.length;i++)
               if(count[i]!=0)
                    {
                     con.rollback();
                     break;
                     }
    }
}
ClassPath:Add mysql-connector-java-5.0.8-bin.jar  to your classpath

Batch Update Using Statement with MySql Database

BatchExecuteStatement.java
------------------------------------------------------------------------------------------------------
import java.sql.Connection;
import java.sql.DriverManager;
import java.sql.Statement;

public class BatchExecuteStatement {

    public static void main(String[] args)throws Exception
    {
         String userName = "root";
         String password = "root";
         String url = "jdbc:mysql://localhost/dhportaldb";
         Class.forName ("com.mysql.jdbc.Driver").newInstance ();
         Connection con = DriverManager.getConnection (url, userName, password);
        
       con.setAutoCommit(false);
      
      // PreparedStatement pst=con.prepareStatement("insert into");
       Statement st=con.createStatement();
       st.addBatch("insert into employee values(101,'raj')");
       st.addBatch("insert into employee values(102,'satyam')");
       st.addBatch("insert into employee values(103,'wipro')");
       st.addBatch("insert into employee values(104,'suman')");
      
      int count[]=st.executeBatch();
      con.commit();
     
      for(int i=0;i<count.length;i++)
               if(count[i]!=0){con.rollback();break;}
    }
}


CLASSPATH:-Add mysql-connector-java-5.0.8-bin.jar in Classpath

Wednesday, December 21, 2011

Get All the Files and Folders Present inside the Directory

This is one of the way to get the list of all the files and folders present inside a particular folder,
I assume here that you have C:\store  folder in your computer with some subfolders and files inside it.


import java.io.File;
import java.io.IOException;

public class GetAllFilesAndFoldersInDirectory
{
public static void main(String[] args) throws IOException
{
File dir = new File("c:/store");
//All the files and folder names inside C:/store will be stored in this array
String[] list = dir.list();

if (list == null)
{
    // Either dir does not exist or is not a directory
}
else
{
    for (int i=0; i<list.length; i++)
    {
        // Get filename of file or directory
        String filename = list[i];
        System.out.print(filename+"::");
       
        //check if its a file or directory
        File tf = new File(dir.getPath(), list[i]);
        if (tf.isDirectory())
          System.out.println("directory");
          else System.out.println("file");
   
     }//for
}//else
}//main
}//class

Tuesday, December 20, 2011

Create Folders SubFolders using Java

CreateDirectory.java
-------------------------------------------------------------------------------------------------------
import java.io.*;
class CreateDirectory
{
 public static void main(String args[])
  {
  try{
  String myfolder ="c:/test";
  String mySubFolder1="c:/test/dir1";
  String mySubFolder2="c:/test/dir2";
  String mySubFolder3="c:/test/dir3/dir4/dir5";
  // Create folder test under c:
  //return true if created successfully
 
  boolean success = (new File(myfolder)).mkdir();
 
  //create a file inside that folder,returns true if successful
  success = new File("c:/test/myfile.txt").createNewFile();
 
 
  // Create multiple folders inside test
  success = (new File(mySubFolder1)).mkdir();
  success = (new File(mySubFolder2)).mkdir();
  success = (new File(mySubFolder3)).mkdirs();
 
 
System.out.println("Successfull");
  }catch (Exception e){System.err.println("Error: " + e.getMessage());}
  }//main
}//class
-----------------------------------------------------------------------------------------------------------

Create File Using Java

Some times we need to create a File,using java.Here is the code


CreateFile.java
----------------------------------------------------------------------------------------------------
import java.io.BufferedWriter;
import java.io.File;
import java.io.FileWriter;
import java.io.IOException;

public class CreateFile
{
    public static void main(String[] args) throws IOException
    {
        boolean msg=false;
        File f = new File("c:/myfile.txt");
        //check if file is not present
        if (!f.exists()) msg=f.createNewFile();//returns boolean
       
        System.out.println("File Created ?"+msg);
       
        FileWriter fstream = new FileWriter("c:/myfile.txt");
        BufferedWriter out = new BufferedWriter(fstream);
        out.write("Hello World2");
        out.close();
        System.out.println("File Written Successfully");
    }
}
-----------------------------------------------------------------------------------------------

Saturday, December 17, 2011

Getting File Content to a String


Concept :Read the file character by character and append it to a String


FileToString.java
import java.io.BufferedReader;
import java.io.FileReader;

public class FileToString
{
public static void main(String[] args) throws Exception
{
    String fileContent=readFileAsString("c:\\store\\readme.txt");
    System.out.println(fileContent);
}

private static String readFileAsString(String filePath)throws Exception
{
    String fileData = new String();
    BufferedReader reader = new BufferedReader(new FileReader(filePath));
    char[] buf = new char[1024];
    int numRead=0;
    while((numRead=reader.read(buf)) != -1){
        String readData = String.valueOf(buf, 0, numRead);
        fileData+=readData;
        buf = new char[1024];
    }
    reader.close();
    return fileData.toString();
}
}

Serailization & Deserialization in java

An object becomes serailizable only when its class implements Serializable Interface.
Serializable Object means
1.This Object can move across multiple JVM
2.This Object state can be stored in files.

All Wrapper class are Serializable ,means it can do the above things

transient:-
Let us say a Serializable class "UserDetails"  has 3 member variables
class UserDetails implements Serializable
{
 String username="raja";
String password="raja";
String email="raja@gmail.com";
Demo d;
}

UserDetails ud=new UserDetails();

If i will create the object of this class,and store it in file/move that object across network,password will also be saved/moved in file/network,which is certainly not wat I want.
To restrict certain variable to participate in Serialization,We use transient keyword.

Note:d is the object of Demo class,If Demo class has not implemented Serializable interface,ud fails to Serialize the Object.

eg    transient String password="raja";
------------------------------------------------------------------------------------------------------------
Test.java
------------------------------------------------------------------------------------------------------------
import java.io.FileInputStream;
import java.io.FileOutputStream;
import java.io.ObjectInputStream;
import java.io.ObjectOutputStream;
import java.io.Serializable;
class Test implements Serializable
{
        int i=10,j=20;
        transient int k=30;
}
---------------------------------------------------------------------------------------------------------
SerializationDemo.java
---------------------------------------------------------------------------------------------------------
public class SerializationDemo
{
public static void main(String s[]) throws Exception
{
      Test t1=new Test();
      System.out.println("Read  value from object");
      System.out.println(t1.i+":"+t1.j+":"+t1.k);
     
      //writing object into file
      FileOutputStream fos=new FileOutputStream("c:/serialized.txt");
      ObjectOutputStream oos=new ObjectOutputStream(fos);
      oos.writeObject(t1);
      oos.close();
     
      //reading data from file and constructing new object
      FileInputStream fis=new FileInputStream("c:/serialized.txt");
      ObjectInputStream ois=new ObjectInputStream(fis);
      Test t2=(Test)ois.readObject();
      System.out.println("Read  value of New Object");
      System.out.println(t2.i+":"+t2.j+":"+t2.k);
     
      System.out.println("Address of T1 :"+t1+"\n Address of T2 :"+t2);
 }
}
-------------------------------------------------------------------------------------------------------------


Creating Your Own Annotations in Java

Annotations are java statements used for Configuration.
 Annotations are there from JSE level Like  @Deprecated,@Override
Lets look on how can we create our own annotaions


General guidelines to be followed while defining annotations:
  1. Annotation declaration should start with an ‘at’ sign like @, following with an interface keyword, following with the annotation name.
  2. Method declarations should not have any parameters.
  3. Method declarations should not have any throws clauses.
  4. Return types of the method should be one of the following:
    • primitives
    • String
    • Class
    • enum
    • array of the above types
There are specific annotations which can only be used in the context of annotations. The annotations are target, retention, documented and inherited.
Let’s look at their usage one at a time. First let’s look at target annotation. The target annotation defines which program elements can have annotations of the defined type. The user can put in the following options:
  1. TYPE: Class, interface, or enum (not annotation)
  2. FIELD: member fields (including enum values)
  3. METHOD: methods (does not include constrcutors)
  4. PARAMETER: method parameter
  5. CONSTRUCTOR: constructor
  6. LOCAL_VARIABLE: local variable or catch clause
  7. ANNOTATION_TYPE: Annotation types
  8. PACKAGE: java package
@Retention
The retention annotation indicates where and how long annotations of this type will be retained. This annotation has three options source, class and runtime. If the retention option selected is source, the annotation is discarded post compilation. Examples of such annotation types are @Override and @SuppressWarnings. The next option is class, the annotation is discarded during class load. The last option is the runtime. The annotation information marked using this option is never discarded. The annotation should be available for reflection at runtime. Example of annotation that could be useful at runtime is @Deprecated. 

@Documented
By default, the annotation and related information does not appear in the class javadoc. A marker annotation @Documented in provided to cause the annotation related information to be added in the class javadoc. The Documentation custom annotation can use the @Documented in the following manner.


Resources Needed To Create Annotations
1.An Interface(representing Annotations)
2.Client Class that uses our Annotations

3.Observer class that check whether annotations are applied on our class or not,if applied gives its behavior

Requirement
--------------
My Requirement is very simple
I will create a class with a variable,I will apply annotation to the variable with 2 arguments as number,
After the program is executed,I will get the sum of those 2 number in that variable


Sum.java
------------------------------------------------------------------------------------------------------------
package p1;

import java.lang.annotation.ElementType;
import java.lang.annotation.Retention;
import java.lang.annotation.RetentionPolicy;
import java.lang.annotation.Target;

@Retention(RetentionPolicy.RUNTIME)
@Target(ElementType.FIELD)
public @interface Sum {
    int num1() default 0;
    int num2() default 0;
}
//useage        @Sum(num1=5,num2=10)
//abstract methods of interface will act as parameter name of annotation,and return type of those methods will //act as datatype of value passed to those parameter names
---------------------------------------------------------------------------------------------------------------------------------
Container.java
------------------------------------------------------------------------------------------------------------
package p1;
import java.lang.reflect.Field;
public class Container
{
    public static void addThis(Object theObject)
    {
        try{
            Field [] fields = Class.forName(theObject.getClass().getName()).getDeclaredFields();
           
            for (int i = 0; i < fields.length; i++)
            {
                //get access to @Sum annotation
                Sum obj = fields[i].getAnnotation(Sum.class);
                if(obj != null)
                {
                    //getting values from annotations parameter
                    int val1 = obj.num1();
                    int val2 = obj.num2();
                   
                    int tot=val1+val2;
                    //setting it to our class variable
                    fields[i].setInt(theObject,tot );
                }//if
            }//for
        }catch(Exception e){e.printStackTrace();}
    }//addThis
}//class
-------------------------------------------------------------------------------------------------------------
Test.java
-------------------------------------------------------------------------------------------------------------
package p1;
public class Test
{
    @Sum(num1=15,num2=10)
    static int result;
   
    public static void main(String[] args)
    {
        Test theObject = new Test();
        Container.addThis(theObject);
        System.out.println("The Sum is "+result);
    }
}
-------------------------------------------------------------------------------------------------------------
Note:Execute Test.java and you will see Container.java injecting variables to result variable

Annotations at Method Level
------------------------------
Requirement,based on the frequency,the method will be invoked multiple times
------------------------------------------------------------------------------------------------------------------------------------
InvokeMultiple.java
--------------------------------------------------------------------------------------------------------------
package p2;

import java.lang.annotation.ElementType;
import java.lang.annotation.Retention;
import java.lang.annotation.RetentionPolicy;
import java.lang.annotation.Target;

@Retention(RetentionPolicy.RUNTIME)
@Target(ElementType.METHOD)
public @interface InvokeMultiple {
    int frequency() default 1;
}
--------------------------------------------------------------------------------------------------------------
MultipleInvoker.java 
--------------------------------------------------------------------------------------------------------------
package p2;

import java.lang.reflect.Method;
public class MultipleInvoker
{
    public static void invokeThis(Object theObject)
    {
        try{
            Method [] methods = Class.forName(theObject.getClass().getName()).getMethods();
            for (int i = 0; i < methods.length; i++)
            {
                InvokeMultiple invokeMultiple = methods[i].getAnnotation(InvokeMultiple.class);
                if(invokeMultiple != null)
                {
                    int count = invokeMultiple.frequency();
                    for (int j = 0; j < count; j++)
                        methods[i].invoke(theObject, null);
                }//if
            }//for
        }catch(Exception e){}
    }//invokeThis
}//class

--------------------------------------------------------------------------------------------------------------

TestObject.java
--------------------------------------------------------------------------------------------------------------
package p2;
public class TestObject
{
String name="Raja";
    @InvokeMultiple(frequency=2)
    public void printName(){
        System.out.println(name);
    }

    public static void main(String[] args) {
        TestObject theObject = new TestObject();
        MultipleInvoker.invokeThis(theObject);
    }
}
---------------------------------------------------------------------------------------------------------------

Wednesday, December 14, 2011

Problem while Attaching Datepicker to Dynamic Page

Datepicker is not attached in Dynamic form,whenever a new row is added.
-----------------------------------------------------------------------
If you are working with javascript,that dynamically creates a new row upon clicking Add button
& one of the field(dob) is datepicker,then usually u will find a problem

Newly created rows may not shown you datepicker on clicking the textfield.
This is because DOM object is not updated by javascript engine.


A way to overcome this problem is
When ever you click on add button,call a method,which once again applies datepicker to all the dob column

I will use jquery to do this stuff


DynamicForm.html
----------------------
<script src="js/jquery-1.5.2.min.js"></script>

<script type="text/javascript" src="js/jquery.datepick.js"></script>
<style type="text/css">
@import "css/jquery.datepick.css";
</style>

<script type="text/javascript">

$(document).ready(function()   //onpageload,when dom tree is ready execute this block
 {
       updateDatePicker();         //applies datepicker on existing form compents
  });

   function updateDatePicker()
   {
       //for all the input textfield whose name starts with startDate,apply datepicker
      $("input:text[name^=startDate]").datepick();//here iam referring component by its name,
//for all the input textfield whose id starts with endDate,apply datepicker
      $("input:text[id^=endDate]").datepick();//you can even refer by id
       
   }
function addRow()
{
//logic to dynamically add record,
updateDatePicker();
//call this method to apply datepicker again on the whole thing,so that newly created columns will also be //effected
}

</script>


<html>
        ------------------------
        ------------------------
    <input type=text name=startDate1>
    <input type=text id=endDate1 name=edate1>
    <input type=button onclick=addRow()>
</html>


Monday, December 12, 2011

Jquery Returning Value to JavaScript

 Sometime we need to use the response given by AJAX,outside of AJAX(somewhere else in java script)
 here is the approach.
 
<script language="JavaScript" src="jquery-1.4.2.min.js"></script>
<Script language="JavaScript">
$(document).ready(f1);
 
function f1()
{var total = $.ajax({
                    type: "POST",
                    url: "add.jsp",
                    data: "num1=10&num2=20",
                    async: false
                   }).responseText; 
//use total here
}
</Script>
 
add.jsp
-------
<%
int sum=Integer.parseInt(request.getParameter("num1"))+Integer.parseInt(request.getParameter("num2"));
 out.println(sum);
%>


Saturday, December 10, 2011

Adding Struts 2 capability in Eclipse Genemede

Eclipse Genemede does not contain builtin feature to create stuts,spring project
If u want Struts capabilities with struts
Do the following
1>launch MyEclipse->Help->Software Updates

2.From "Available Software" tab,Click on "Add Site" button and add the following url
http://mvcwebproject.sourceforge.net/update/


3.Click Ok,1 more site is added to your plugins area,select that site which contains Struts2 plugin,click install


4>click finish.


5.The plugin will be successfully installed and you can now create struts 2.x Application on it

Thursday, December 8, 2011

Refreshing the Page Using JavaScript

Call fun1() whenever you want to refresh ur page in javascript

function fun1()
{
window.location.reload(true);

}

Days Difference Between 2 dates in JavaScript

Assuming your format is yyyy-MM-dd  where MM starts with 0,The code to find the days difference is as follows

 <script language=javaScript>
function fun1()
{
    var sdt = "2011-03-04";   
    var edt = 2011-04-05;
   
    sYear=sdt.substring(0,4);
    sMonth=parseInt(sdt.substring(5,7))-1;
    sDate=sdt.substring(8,10);
  
    alert(sYear+"::"+sMonth+"::"+sDate)
  
    eYear=edt.substring(0,4);
    eMonth=parseInt(edt.substring(5,7))-1;
    eDate=edt.substring(8,10);
  
    var dt1=new Date()
    dt1.setFullYear(sYear,sMonth,sDate);  //yyyy,mm,date
  
    var dt2=new Date()
    dt2.setFullYear(eYear,eMonth,eDate);

    var milliSecDiff=dt2.getTime() - dt1.getTime();
    var daysDiff=milliSecDiff/(1000*60*60*24);
    alert(daysDiff);
}

</script>


Tuesday, December 6, 2011

JAX-Ws Based Spring Webservices With Arguments

Now Lets us see how to create a Spring WebService,which takes parameters,does sumthing with that and returns the Result.

ServerSide

CalculatorInter.java
-----------------------
package com.satya;
public interface CalculatorInter {
    public String sum(int x,int y);
}

CalculatorImpl.java
----------------------
package com.satya;
   
import javax.jws.WebMethod;
import javax.jws.WebService;
import javax.jws.soap.SOAPBinding;

import org.springframework.stereotype.Service;
@SOAPBinding(style=SOAPBinding.Style.RPC,use=SOAPBinding.Use.LITERAL,parameterStyle=SOAPBinding.ParameterStyle.WRAPPED)
@WebService(serviceName="CalcyWs")
@Service("Calcy")
public class CalculatorImpl implements CalculatorInter {
@WebMethod
public String sum(int x, int y) {
    return ""+(x+y);
    }
}

ServiceExposer.java
---------------------
package com.satya;
import org.springframework.context.support.*;
public class ServiceExposer {
    public static void main(String[] args)
    {
        FileSystemXmlApplicationContext ctx=new FileSystemXmlApplicationContext("ServerCfg.xml");
        System.out.println("Service Exposed successfully");
    }
}


ServerCfg.xml
-----------------
<beans xmlns="http://www.springframework.org/schema/beans"  xmlns:xsi="http://www.w3.org/2001/XMLSchema-instance" xmlns:p="http://www.springframework.org/schema/p"
 xmlns:aop="http://www.springframework.org/schema/aop" xmlns:context="http://www.springframework.org/schema/context"
 xmlns:jee="http://www.springframework.org/schema/jee" xmlns:tx="http://www.springframework.org/schema/tx"
 xmlns:task="http://www.springframework.org/schema/task"
 xsi:schemaLocation="http://www.springframework.org/schema/aop http://www.springframework.org/schema/aop/spring-aop-3.0.xsd
   http://www.springframework.org/schema/beans http://www.springframework.org/schema/beans/spring-beans-3.0.xsd
   http://www.springframework.org/schema/context http://www.springframework.org/schema/context/spring-context-3.0.xsd
   http://www.springframework.org/schema/jee http://www.springframework.org/schema/jee/spring-jee-3.0.xsd
 http://www.springframework.org/schema/tx http://www.springframework.org/schema/tx/spring-tx-3.0.xsd
   http://www.springframework.org/schema/task http://www.springframework.org/schema/task/spring-task-3.0.xsd">

 <context:component-scan base-package="com.satya" />

 <bean class="org.springframework.remoting.jaxws.SimpleJaxWsServiceExporter">
  <property name="baseAddress" value="http://localhost:5678/" />
 </bean>

</beans>
*****************************SERVER-PROG-ENDS*******************************
Note:-Execute ServiceExposer.java to publish our CalculatorImpl.class as webservice
To view WSDL:   http://localhost:5678/CalcyWs?WSDL


**********************************Client-Side***************************************
CalculatorInter.java
---------------------
package p1;

import javax.jws.WebService;
import javax.jws.soap.SOAPBinding;

@WebService
@SOAPBinding(style=SOAPBinding.Style.RPC, use=SOAPBinding.Use.LITERAL, parameterStyle=SOAPBinding.ParameterStyle.WRAPPED)
public interface CalculatorInter {
    public String sum(int x,int y);
}

ServiceClient.java
------------------
package p1;
import org.springframework.context.support.FileSystemXmlApplicationContext;
public class ServiceClient {
public static void main(String[] args) throws Exception
{
        FileSystemXmlApplicationContext ctx=new FileSystemXmlApplicationContext("ClientCfg.xml");
        CalculatorInter obj=(CalculatorInter)ctx.getBean("gs");
        System.out.println(obj.sum(15, 10));
}
}


ClientCfg.xml

----------------
<beans xmlns="http://www.springframework.org/schema/beans"
 xmlns:xsi="http://www.w3.org/2001/XMLSchema-instance" xmlns:p="http://www.springframework.org/schema/p"
 xmlns:aop="http://www.springframework.org/schema/aop" xmlns:context="http://www.springframework.org/schema/context"
 xmlns:jee="http://www.springframework.org/schema/jee" xmlns:tx="http://www.springframework.org/schema/tx"
 xmlns:task="http://www.springframework.org/schema/task"
 xsi:schemaLocation="http://www.springframework.org/schema/aop http://www.springframework.org/schema/aop/spring-aop-3.0.xsd
   http://www.springframework.org/schema/beans http://www.springframework.org/schema/beans/spring-beans-3.0.xsd
   http://www.springframework.org/schema/context http://www.springframework.org/schema/context/spring-context-3.0.xsd
   http://www.springframework.org/schema/jee http://www.springframework.org/schema/jee/spring-jee-3.0.xsd
   http://www.springframework.org/schema/tx http://www.springframework.org/schema/tx/spring-tx-3.0.xsd
   http://www.springframework.org/schema/task http://www.springframework.org/schema/task/spring-task-3.0.xsd">


 <bean id="gs" class="org.springframework.remoting.jaxws.JaxWsPortProxyFactoryBean">
<property name="wsdlDocumentUrl" value="http://localhost:5678/CalcyWs?WSDL"/>
<property  name="serviceName" value="CalcyWs"/>
<property name="namespaceUri" value="http://satya.com/"/>
<property name="serviceInterface" value="p1.CalculatorInter"/>
<property name="portName" value="CalculatorImplPort"/>


 </bean>
 </beans>

************************PROGRAM-ENDS****************************************
Note:Run ServiceClient.java to consume webservice


JAX-Ws Based Spring Webservices W/o Arguments

Here we are going to create a JAX-Ws based webservices in spring that simply return a message without taking any arguments.

GreetingServiceInter.java
-------------------------
package com.satya;

public interface GreetingServiceInter {
    public String sayHello();
}


GreetingService.java
------------------------
package com.satya;
    
import javax.jws.WebService;
import javax.jws.soap.SOAPBinding;
import javax.jws.soap.SOAPBinding.ParameterStyle;
import org.springframework.stereotype.Service;

@SOAPBinding(parameterStyle=ParameterStyle.BARE)
@WebService(serviceName="GreetingService")
@Service("greetingService")
public class GreetingService implements GreetingServiceInter
{
 public String sayHello()
 {
  return "Hello from Greeting Service";
 }
}
ServiceExposer.java
-----------------------
package com.satya;
import org.springframework.context.support.*;
public class ServiceExposer {
    public static void main(String[] args)
    {
        FileSystemXmlApplicationContext ctx=new FileSystemXmlApplicationContext("MyCfg.xml");
        System.out.println("Service Exposed Successfully ");
    }
}

MyCfg.xml
-------------
<beans xmlns="http://www.springframework.org/schema/beans"
 xmlns:xsi="http://www.w3.org/2001/XMLSchema-instance" xmlns:p="http://www.springframework.org/schema/p"
 xmlns:aop="http://www.springframework.org/schema/aop" xmlns:context="http://www.springframework.org/schema/context"
 xmlns:jee="http://www.springframework.org/schema/jee" xmlns:tx="http://www.springframework.org/schema/tx"
 xmlns:task="http://www.springframework.org/schema/task"
 xsi:schemaLocation="http://www.springframework.org/schema/aop http://www.springframework.org/schema/aop/spring-aop-3.0.xsd
   http://www.springframework.org/schema/beans http://www.springframework.org/schema/beans/spring-beans-3.0.xsd
   http://www.springframework.org/schema/context http://www.springframework.org/schema/context/spring-context-3.0.xsd
   http://www.springframework.org/schema/jee http://www.springframework.org/schema/jee/spring-jee-3.0.xsd
 http://www.springframework.org/schema/tx http://www.springframework.org/schema/tx/spring-tx-3.0.xsd
   http://www.springframework.org/schema/task http://www.springframework.org/schema/task/spring-task-3.0.xsd">

 <context:component-scan base-package="com.satya" />
<bean class="org.springframework.remoting.jaxws.SimpleJaxWsServiceExporter">
                   <property name="baseAddress" value="http://localhost:1234/" />
</bean>
 </beans>


Note:-Run ClientExposer.java to expose your GreetingService.java (sayHello()) as WebService
This set up will use Java WebServer(jdk1.6+ supported),to expose the webservice.
Here we have decided to expose the webservice at port no 1234,

To view WSDL
                             http://localhost:1234/GreetingService?WSDL

***********************************************************************************
                                                          Client Side
***********************************************************************************
GreetingServiceInter.java
--------------------------
package p1;

import javax.jws.WebService;
import javax.jws.soap.SOAPBinding;
import javax.jws.soap.SOAPBinding.ParameterStyle;

@WebService
@SOAPBinding(parameterStyle=ParameterStyle.BARE)
public interface GreetingServiceInter {
    public String sayHello();
}

ServiceClient.java
-------------------
package p1;
import org.springframework.context.support.*;
public class ServiceClient {
    public static void main(String[] args)
    {
        FileSystemXmlApplicationContext ctx=new FileSystemXmlApplicationContext("ClientCfg.xml");
        GreetingServiceInter test=(GreetingServiceInter)ctx.getBean("gs");
        System.out.println("result is"+test.sayHello());
    }
}
ClientCfg.xml

--------------
<beans xmlns="http://www.springframework.org/schema/beans"
 xmlns:xsi="http://www.w3.org/2001/XMLSchema-instance" xmlns:p="http://www.springframework.org/schema/p"
 xmlns:aop="http://www.springframework.org/schema/aop" xmlns:context="http://www.springframework.org/schema/context"
 xmlns:jee="http://www.springframework.org/schema/jee" xmlns:tx="http://www.springframework.org/schema/tx"
 xmlns:task="http://www.springframework.org/schema/task"
 xsi:schemaLocation="http://www.springframework.org/schema/aop http://www.springframework.org/schema/aop/spring-aop-3.0.xsd
   http://www.springframework.org/schema/beans http://www.springframework.org/schema/beans/spring-beans-3.0.xsd
   http://www.springframework.org/schema/context http://www.springframework.org/schema/context/spring-context-3.0.xsd
   http://www.springframework.org/schema/jee http://www.springframework.org/schema/jee/spring-jee-3.0.xsd
 http://www.springframework.org/schema/tx http://www.springframework.org/schema/tx/spring-tx-3.0.xsd
   http://www.springframework.org/schema/task http://www.springframework.org/schema/task/spring-task-3.0.xsd">

<bean id="gs" class="org.springframework.remoting.jaxws.JaxWsPortProxyFactoryBean"
  p:wsdlDocumentUrl="http://localhost:1234/GreetingService?WSDL"   p:serviceName="GreetingService"
  p:portName="GreetingServicePort"   p:serviceInterface="p1.GreetingServiceInter"
  p:namespaceUri="http://satya.com/"/>
 
  </beans>

********************************PROGRAM-ENDS**********************************
Note:Run ServiceClient.java to access WebService